Commissioning was definitely the most fun part of the process–OK, a little nerve-racking, sure, because you don’t know until you flip those switches if you really did everything right. In a hybrid system like ours, the first step (after checking all those connections thoroughly once again!) is to close the breakers that connect the battery bank. With everything powered up, I was able to program the control unit, which is actually a fairly involved process–lots and lots of options and parameters. It’s important to get those right, or it’s possible to damage components. The next step was closing the breaker for the grid feed and checking the voltage, followed by the breaker protecting the critical loads panel. Multimeter checks confirmed all was well. The next morning I eagerly waited for sunrise–a long wait in mid-December–and to my delight the arrays began cranking out the amps. Slowly at first, but by noon the current was really flowing.
Once the battery bank was topped off (didn’t take long since these were new batteries), the system started pushing excess power to the main service entrance panel and out to the grid. I have to admit I felt like a little kid when I saw that meter spinning away. Everything was working just fine.

There were a few minor hiccups here and there over the next several weeks, tweaking the programmable settings and dialing the settings in. I had some strange persistent problems with the system’s computerized “brain” (an Outback MATE3s) and after extensive troubleshooting and back and forth with Outback tech. support I had them ship me a new unit. That solved the issues.
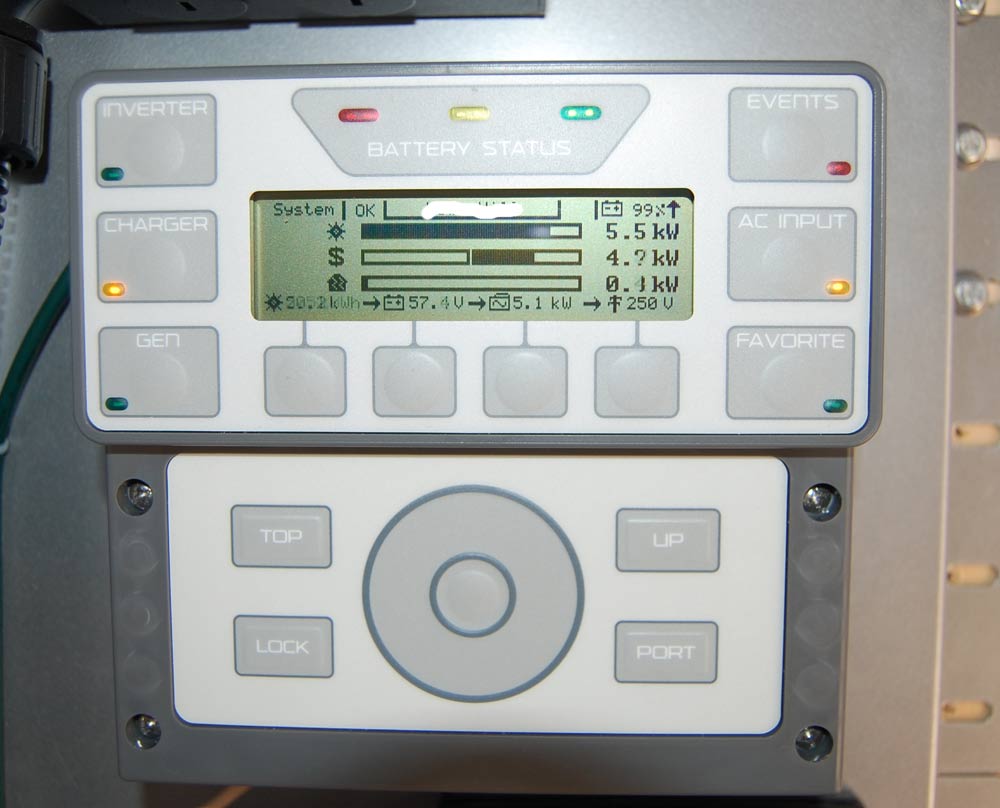
It was interesting to see the actual output of the system versus its rated power. At solar noon, on a cold day (PV modules work most efficiently in cold), the output routinely breaks the nameplate rating of the array (6.4 kW). Add in a few isolated clouds, where you get the “edge effect,” and the PV power broke 7kW.
Outback provides an online monitoring system that makes it easy to keep an eye on everything and review performance data. It also allows you to make adjustments remotely, which can be handy when you’re away from home. While I have some reservations about having system controls available online (access is by user login, but let’s face it, anything online is potentially vulnerable), for the time being I’m using it and find it helpful. There’s a simpler browser-based monitor that I use on our local area network, which is secured behind a firewall. This is probably a better bet in terms of security, but has fewer features.
So, roughly three months after we decided to tackle this solar installation ourselves, we have a complete system up and running. It wasn’t easy, but it wasn’t really all that hard, either, and it taught me a huge amount about how residential solar systems work. If you’re considering a self-install, I hope this helps (just be sure to get some help on the rooftop!). It turned out that getting everything in place before the January 1, 2018 deadline for the net metering changes was a very good thing, because the new rules here in Maine have been a complete debacle (more on that in a later post). All in all, this had to be one of the most rewarding “home improvement” projects I’ve ever done, and I look forward in future posts to sharing more about maintenance and fine-tuning the system.